
This post contains affiliate links.
Have you ever finished a long day of work feeling stiff and sore, wondering if your chair or desk is to blame? The culprit could be your chair and desk heights. This guide will show you how to adjust them for better health and productivity.
Adjust your chair height so your feet rest flat and knees are at 90 degrees, and set your desk height to keep forearms parallel to the floor. This setup reduces strain on your back, neck, and wrists, promoting better posture and comfort.
But there’s more to ergonomic adjustments than meets the eye. Keep reading to learn about optimizing your posture, finding the right desk height, and using accessories that enhance comfort and efficiency.
Step 1: Assess Your Current Workspace

Before diving into the adjustments, it’s crucial to assess your current workspace setup. This initial evaluation lays the foundation for creating an ergonomic environment that caters to your comfort and health.
Identifying Common Issues with Chair and Desk Setup
Start by observing your chair. Is it causing discomfort in your lower back? Do your feet dangle without touching the floor? These are signs that your chair may not be the right height or lack adequate lumbar support.
Similarly, take note of any discomfort in your wrists, neck, or eyes, which could indicate issues with your desk height or monitor placement.
Remember, a chair too low can strain your thighs and knees, while a chair too high can leave your feet unsupported, impacting circulation.
A desk that’s too high forces your shoulders and arms into an uncomfortable elevation, leading to strain, whereas a desk too low can cause you to hunch over, leading to back and neck pain.
Tools You Might Need for Adjustment
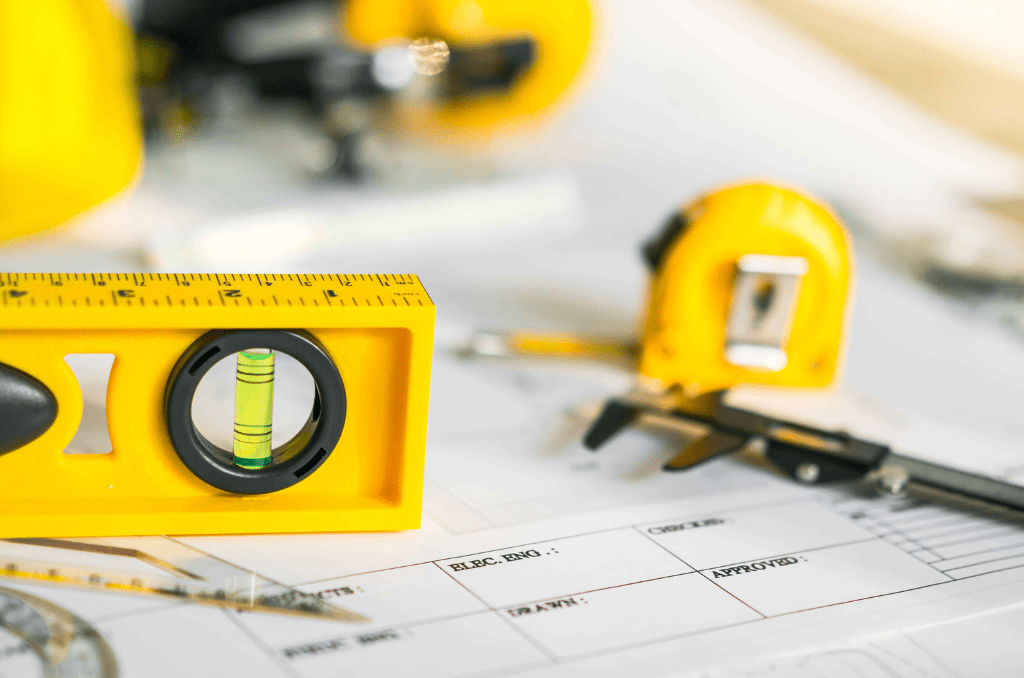
To make these adjustments, you might need a few basic tools:
- Tape Measure: Essential for measuring the height of your chair, desk, and the distance of your monitor.
- Level: To ensure that your work surface is perfectly horizontal, which is important for maintaining balance and preventing items from sliding.
- Adjustment Tools: Depending on your furniture, this could include a screwdriver or an Allen wrench for loosening and tightening bolts.
- Footrest (optional): If your chair is too high and non-adjustable, a footrest can help maintain proper leg positioning.
- Cushions or Lumbar Supports (optional): These can be used to enhance the ergonomics of your chair, especially if it lacks proper lower back support.
Step 2: Adjust Your Chair for Optimal Comfort
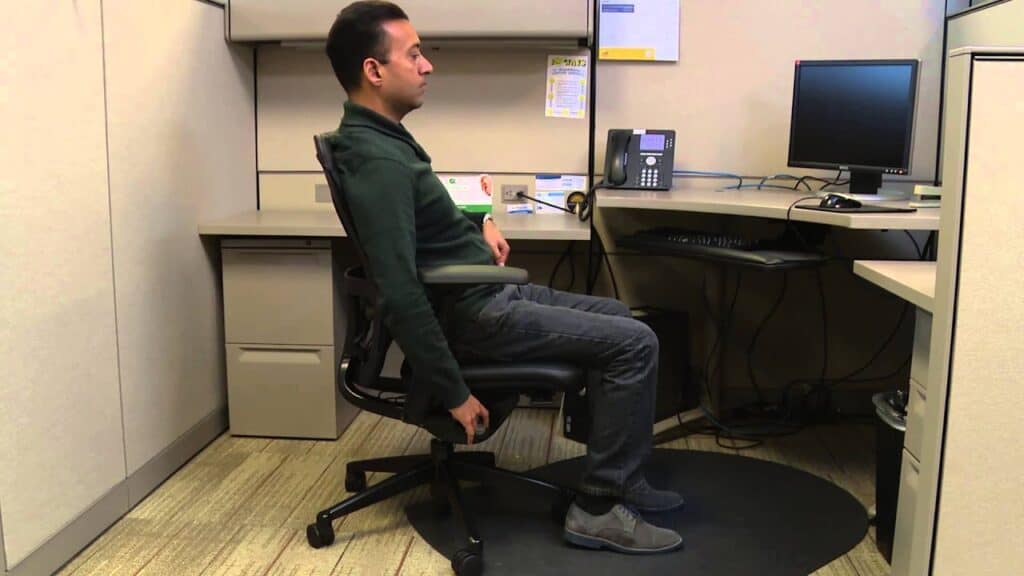
Adjusting your chair is a critical step in creating an ergonomic workspace. The right adjustments can alleviate discomfort and prevent long-term health issues.
How to Determine the Correct Chair Height
The correct chair height is essential for maintaining good posture and reducing strain. To find the ideal height:
- Sit in your chair and place your feet flat on the floor.
- Ensure that your knees are at a 90-degree angle, with your thighs parallel to the floor.
- Your arms should be at desk level, allowing your shoulders to relax without slouching or elevating.
Data from ergonomic studies suggest that the average desk height is around 29 inches, so your chair should be adjusted in relation to this. However, this can vary based on your height and the height of your desk.
Adjusting the Backrest and Armrests
The backrest of your chair should support the natural curve of your spine. Adjust it so that it fits snugly against your lower back. This support is crucial in preventing lumbar pain, a common issue for those who sit for prolonged periods.
While discussing backrests, you may wonder about backless chairs and posture. Are they helpful or not? For insights and surprising facts on this debate, check out my article Is a Backless Chair Better for Posture?
Armrests play a vital role in supporting your arms and reducing strain on your shoulders and neck. Adjust them so your arms can rest comfortably with your shoulders relaxed. Ideally, your elbows should form a 90-degree angle when resting on the armrests.
The Importance of Lumbar Support
Lumbar support is critical in maintaining the spine’s natural curve and preventing slouching. Chairs with built-in lumbar support are ideal, but if yours doesn’t have this feature, you can use a cushion or a rolled-up towel to provide support.
Step 3: Set the Right Desk Height

Finding the right desk height is as crucial as adjusting your chair. It’s a key factor in maintaining good posture and ensuring comfort during long working hours.
Aligning Desk Height with Chair and Body Type
The ideal desk height depends on your chair height and body type. Here’s how to align them:
- Measure Your Elbow Height: Sit in your adjusted chair and measure the distance from the floor to your elbow. This is your ideal desk height.
- Consider Your Body Type: If you’re particularly tall or short, standard desk heights may not suit you. Taller individuals might need a higher desk, while shorter people may require a lower one.
Ergonomic research suggests that the average desk height for most people is between 28 and 30 inches. However, this can vary based on individual height and the type of work you do.
Also, find out if your office chair should fit under your desk in my article, Should Your Office Chair Fit Under Your Desk?
Tips for Using Fixed-Height Desks
If you have a fixed-height desk, here are some tips to make it work for you:
- Use a Desk Riser: If your desk is too low, a desk riser can elevate your work surface to the appropriate height.
- Adjust Your Chair: If your desk is too high and cannot be adjusted, raise your chair to align your elbows with the desk. Use a footrest to support your feet if they don’t reach the floor.
- Keyboard and Mouse Placement: Ensure your keyboard and mouse are at a comfortable height. If your desk is too high, a keyboard tray can help.
Step 4: Fine-Tune Your Seating Position
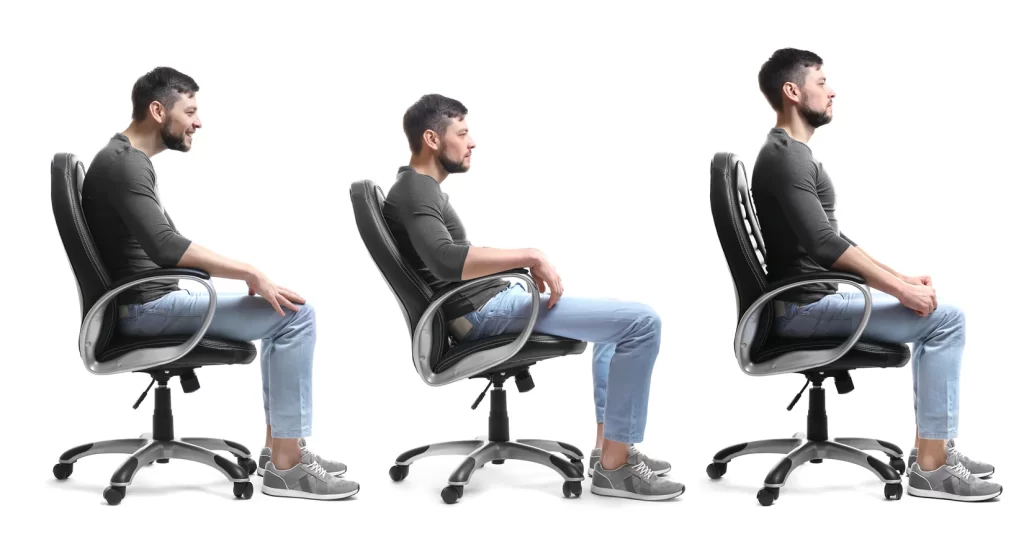
Once you have adjusted your chair and desk heights, the next crucial step is fine-tuning your seating position. This involves not just how you sit, but also how your chair supports your sitting posture.
The Ideal Sitting Position
The ideal sitting position is about maintaining the natural curves of your spine while seated. Here’s what it entails:
- Feet Flat on the Floor: Your feet should rest flat on the floor, or on a footrest if needed. This position helps distribute your weight evenly.
- Knees at the Same Level as Hips: Your knees should be at the same level as your hips or slightly lower, forming a 90-degree angle. This helps reduce pressure on your lower back.
- Back Against the Chair: Your back should be against the chair with the lumbar support fitting snugly into the curve of your lower back.
- Arms Relaxed: Your arms should be relaxed at your sides, with your elbows forming a 90-degree angle when using your keyboard.
Adjusting Seat Depth and Tilt
Seat depth and tilt are often overlooked but are vital for optimal comfort:
- Seat Depth: There should be about 2 to 4 inches of space between the back of your knees and the edge of the seat. This ensures proper circulation and supports your thighs without putting pressure on the back of your knees.
- Seat Tilt: Adjust the tilt to support your preferred sitting position. A slight forward tilt can help maintain the natural curve of your spine and reduce pressure on your lower back.
Step 5: Optimize Keyboard and Mouse Placement
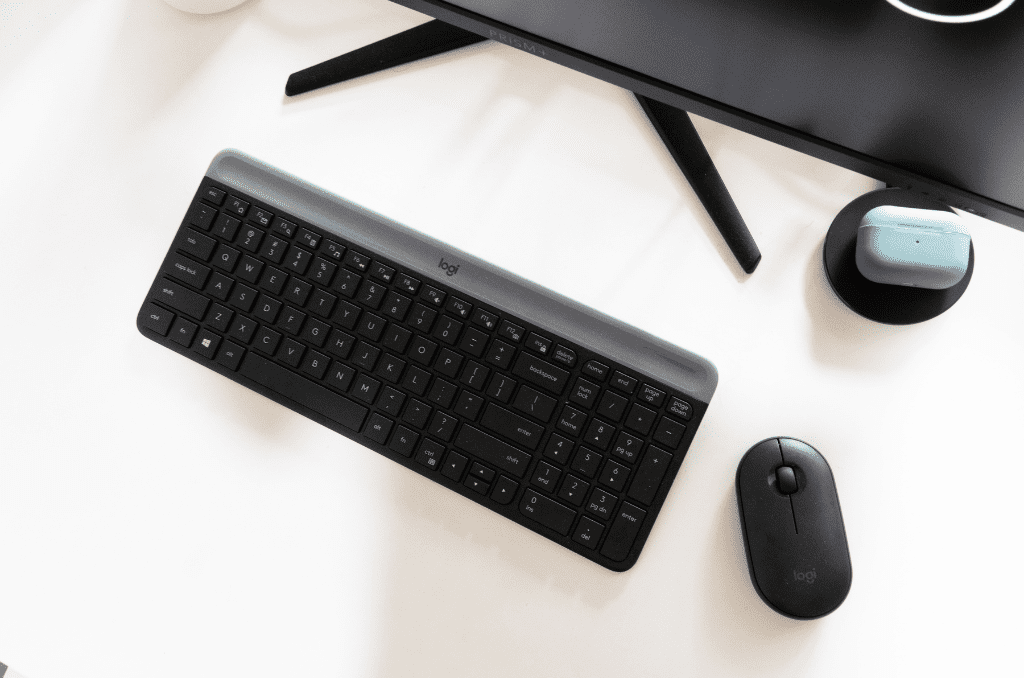
Proper placement of your keyboard and mouse is essential for maintaining good posture and preventing strain in your wrists and arms. This step is often overlooked, but it plays a crucial role in creating an ergonomic workspace.
Proper Keyboard and Mouse Heights
The height of your keyboard and mouse directly affects your arm and wrist posture. Here’s how to set them correctly:
- Keyboard Height: Your keyboard should be positioned so that when typing, your forearms are parallel to the floor, or slightly inclined downwards. This position helps keep your wrists straight, reducing the risk of strain.
- Mouse Position: Place your mouse close to your keyboard. Your arm should be relaxed at your side, with the mouse at the same height as your keyboard. This prevents you from overreaching or twisting your wrist.
Ergonomic experts suggest that the keyboard and mouse should be at elbow level. This alignment allows your shoulders to relax and keeps your wrists in a neutral position, which is crucial for preventing repetitive strain injuries.
Avoiding Strain on Wrists and Arms
To avoid strain:
- Use Wrist Rests: A wrist rest can help maintain a neutral wrist position, but it should be used sparingly. Resting your wrists while typing can increase pressure and lead to discomfort.
- Keyboard Tilt: Adjust the tilt of your keyboard. A slight negative tilt, where the top is lower than the bottom, can help maintain a neutral wrist position.
- Mouse Grip: Use a light grip on your mouse and avoid squeezing or holding it too tightly. This reduces the strain on your fingers and wrist.
Step 6: Adjusting Monitor Height and Distance

Proper monitor placement is a critical aspect of an ergonomic workspace, especially in our screen-centric work environments. It’s not just about reducing eye strain; it’s also about maintaining a healthy, comfortable posture throughout your workday.
Ideal Monitor Position for Eye Comfort
The position of your monitor can have a significant impact on your comfort. Here’s how to set it up ideally:
- Monitor Height: The top of your monitor screen should be at or slightly below eye level. This positioning allows your eyes to naturally look downward at a slight angle, around 15 to 20 degrees.
- Distance: The monitor should be about an arm’s length away. This distance varies depending on the size of your screen and your vision, but generally, it should be around 20-30 inches from your eyes.
Tips for Multiple Monitors
If you use multiple monitors, consider the following:
- Positioning: Place the monitors at the same height and distance. If you use one monitor more frequently, position it directly in front of you and the secondary monitor to the side.
- Angle: The monitors should form a gentle arc in front of you, so you can easily view each screen with minimal head movement.
- Avoiding Overlap: Ensure there’s no overlap of the screens, as this can cause you to twist your neck or body uncomfortably.
Step 7: Incorporating Footrests and Other Accessories
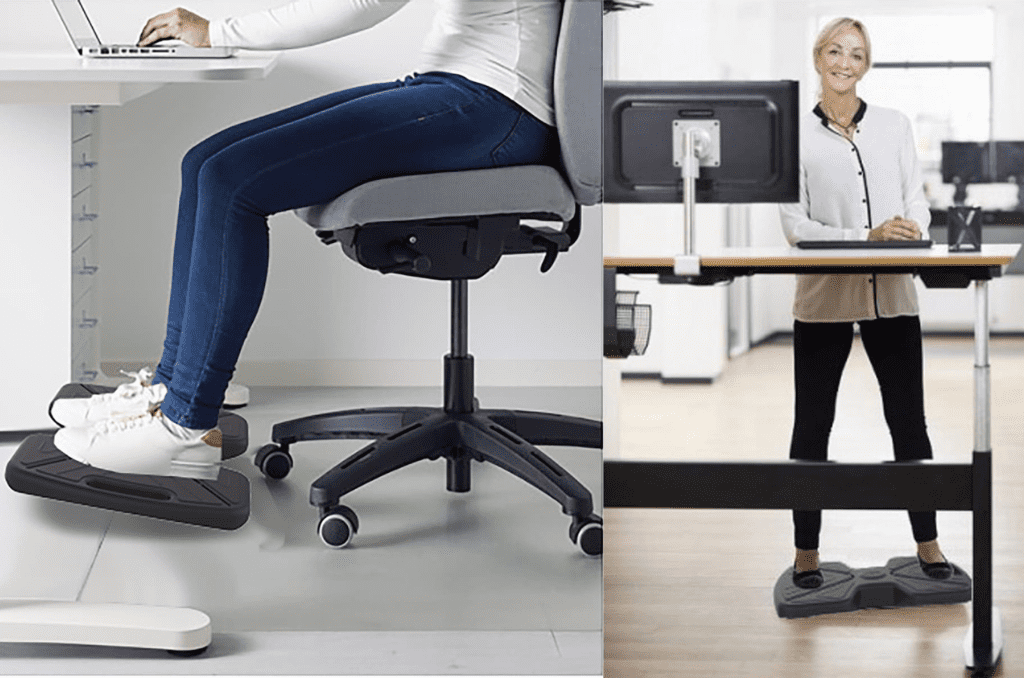
Ergonomic accessories like footrests can play a significant role in enhancing your overall workspace comfort. These tools are not just add-ons; they are essential for those seeking to optimize their ergonomic setup fully.
When and How to Use a Footrest
A footrest is particularly beneficial if your feet do not comfortably reach the floor when seated. Here’s how to use one effectively:
- Choosing the Right Footrest: Look for a footrest that is adjustable in height and tilt. This allows you to customize it to your specific needs.
- Positioning: Place the footrest under your desk so that when you rest your feet on it, your knees maintain a 90-degree angle. This position helps in maintaining proper circulation and reducing pressure on your lower back.
- Usage: Use the footrest throughout the day, especially if you find yourself sitting for long periods. It can also encourage subtle movements of your feet and legs, which is beneficial for circulation.
Ergonomic experts recommend the use of footrests for individuals whose chairs are too high for their feet to rest flat on the floor. According to a study in the “Journal of Physical Therapy Science,” using a footrest can significantly reduce lower back pain in individuals who sit for extended periods.
Additional Ergonomic Accessories
Beyond footrests, there are other accessories to consider:
- Monitor Stands: If your monitor is too low, a monitor stand can raise it to the ideal height, reducing neck strain.
- Keyboard Trays: These are useful if your desk does not allow for proper keyboard placement. They can help maintain a neutral wrist position.
- Document Holders: If you frequently refer to printed materials, a document holder can keep them at the same height and distance as your screen, reducing neck and eye movement.
- Ergonomic Mouse Pads: These often come with wrist rests and can help maintain a neutral wrist position while using your mouse.
Are There Any Exceptions? What About Standing Desks?
When it comes to ergonomics, one size doesn’t fit all. While the guidelines for chair and desk heights are generally applicable, there are exceptions to consider.
Standing desks have gained popularity as a healthier alternative to sitting all day. The key to using a standing desk effectively is to adjust its height so that your screen is at eye height and your arms are at a 90-degree angle when typing.
This setup minimizes strain on your neck and shoulders. If you’re using a standing desk, it’s also a good idea to use an anti-fatigue mat to reduce extra pressure on your legs and feet.
How Do You Know It’s Working? Signs of a Well-Adjusted Setup
Once you’ve adjusted your chair and desk, how can you be sure it’s making a difference?
Physical Signs of a Well-Adjusted Setup
A well-adjusted setup will naturally lead to better posture. You’ll notice less tension in your neck and shoulders, and you won’t feel the need to slouch or hunch over. Your arms and legs will feel more relaxed, and you might even experience less fatigue at the end of the day.
Tools and Apps for Monitoring Posture
Technology can assist in ensuring your setup is ergonomically sound. App like Upright GO can send you reminders to sit up straight. Some ergonomic chairs even come with built-in sensors that alert you when you’re not sitting correctly.
Before You Go…
If you’ve ever experienced the frustration of your office chair sliding off, don’t miss my previous article. It’s packed with practical tips and solutions to ensure your chair stays in place.
How to Keep Your Office Chair From Sliding Off in 3 Easy Steps