This post contains affiliate links.
Setting up a home office desk is a task that, when done correctly, can significantly boost productivity and comfort. This guide provides simple steps to creating an efficient workspace in your home.
It covers everything from choosing the right spot for your desk to organizing your supplies and managing technology. The goal is to help you craft a space that meets your work needs and contributes to your overall well-being.
As you read on, you’ll gain insights into the importance of ergonomics, the benefits of a personalized touch, and the essentials of maintaining an organized desk. This guide is your roadmap to designing a home office that will serve as a foundation for your professional success.
Step 1: Plan Your Home Office Layout
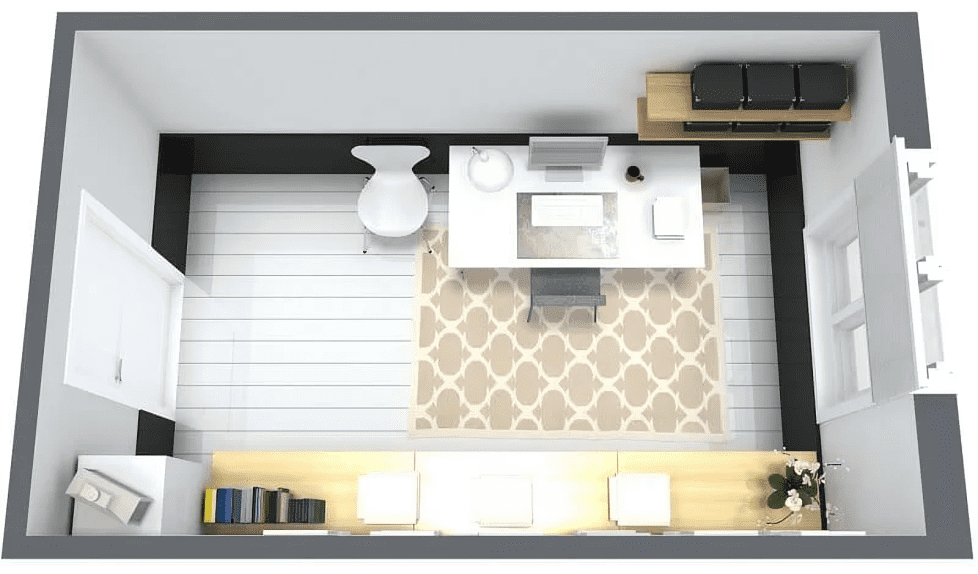
The initial step in creating a home office is planning the layout. This is crucial because a well-thought-out layout can significantly enhance productivity and ensure comfort during long work hours.
When planning, consider the nature of your work. Do you need silence, or is some background noise acceptable? How much desk space do you require for your tasks? Will you be video conferencing and need a backdrop free of distractions?
Start by sketching a rough diagram of your home and identify potential areas for your office. Think about the flow of your workday. Where does the sun rise and set, and how will natural light affect your screen visibility? Position your desk to benefit from natural light without suffering from glare. Also, consider the electrical outlets’ locations, as you’ll need to power your computer, phone, and other equipment.
Accessibility is another factor. If you meet with clients, a space near the entrance might be ideal. However, if you’re a writer or a programmer who needs solitude, a quiet corner away from household traffic would be better. Remember, the layout should serve your workflow, not hinder it.
Step 2: Choose a Prime Location for Your Desk

Selecting the best location for your home office requires balancing practicality with personal preference. A spare room with a door can offer privacy and quiet. However, not everyone has extra space, and that’s okay. Look for underutilized areas like an alcove, a living room corner, or even a section of your bedroom.
Consider the pros and cons of each potential spot. A basement office, for example, offers privacy but may lack natural light and can feel isolating. A desk in the living room keeps you in the heart of the home, but distractions are likely. Weigh these factors against your work needs and habits.
If you’re someone who does well in a busy environment, the activity of a kitchen office might be exciting. But if focusing is important, the quiet of a bedroom desk could be better. Consider foot traffic, household noise, and anything else that might affect your ability to concentrate.
Step 3: Select the Optimal Desk
Consider the entire desk surface area you’ll need when choosing a desk. A larger desk might be necessary for those who need space for multiple monitors, printers, and writing. For those who like to alternate between sitting and standing, an adjustable height desk is a great investment to consider for your office desk setup ideas.
The material of the desk is also important. Solid wood desks are strong and can hold heavy equipment, but can be pricey. Metal and glass desks are modern and easier to move, but they might not be as good at keeping things quiet compared to wood desks.
Height is another consideration. Standard desks are around 29 to 30 inches tall, suitable for most. However, you might need something different if you’re particularly tall or short. Adjustable desks are versatile, allowing you to change the height to suit your needs.
To measure for the right desk size, consider the room’s dimensions where it will reside. Use tape to mark where the desk will go to get a feel for how it will fit into the space. There should be enough room for the chair to move and for you to get up and walk around without feeling cramped.
Remember, your desk is where you’ll spend most of your workday. It should fit your space, support your work, and make your day more productive and less stressful. Choose wisely to ensure it meets all your needs.
Step 4: Pick the Perfect Chair
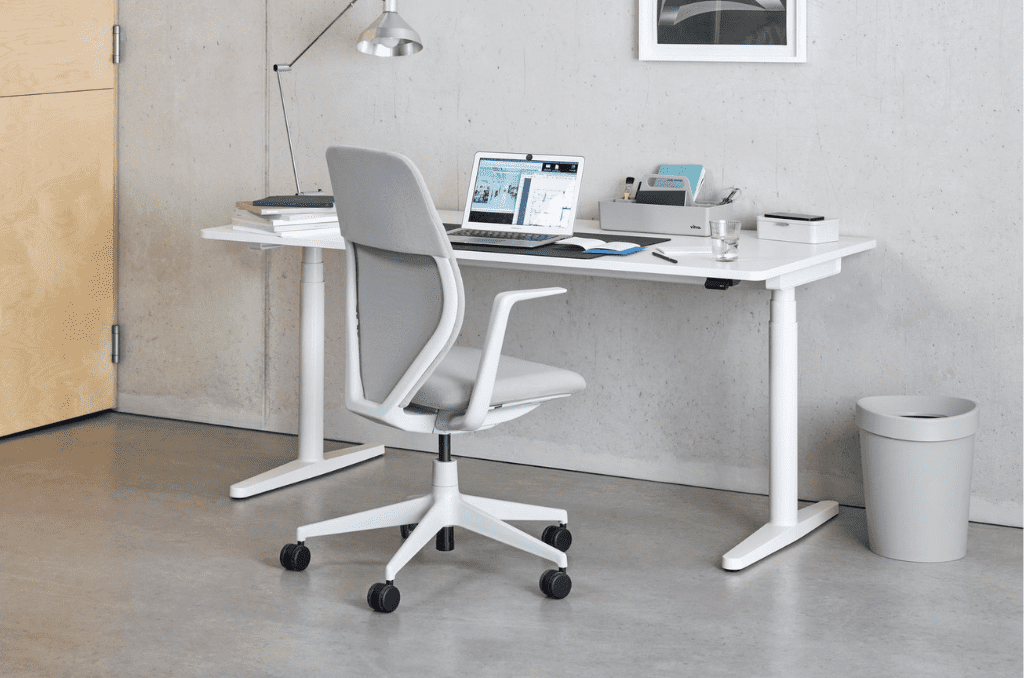
When choosing your office chair, prioritize ergonomic design for comfort during long hours. Look for adjustable lumbar support, seat height, and armrests to promote good posture and reduce strain.
Consider the chair’s material for both comfort and durability. Leather, mesh, fabric, and plastic each offer different benefits, from breathability to ease of cleaning. Choose based on your personal preference and work environment.
Make sure the chair fits well in your workspace, allowing for easy movement around your desk. If space is tight, opt for a chair with a smaller footprint.
Adjustability is key for a personalized fit. Features like tilt tension control and seat depth adjustment ensure your chair can be tailored to your body, enhancing comfort.
Your chair should also match your home office’s style. With a wide range of designs available, select one that complements your decor and reflects your personal taste.
If possible, test the chair before buying to assess its comfort and support. If not, online reviews can provide valuable insights into the chair’s long-term performance and durability.
A well-chosen chair not only looks good in your home office but also supports your health and productivity throughout the day.
Step 5: Strategically Position Your Desk

Strategically positioning your desk in your home office is crucial for maximizing productivity and well-being. The ideal desk placement not only considers the room’s layout but also aligns with principles that enhance focus and comfort.
Here’s a concise guide to help you find the optimal position for your desk, drawing insights from Feng Shui and ergonomic practices.
Facing the Door: Positioning your desk to face the door is often recommended for a clear view of the entrance. This setup, supported by Feng Shui, is believed to command the room’s energy flow, enhancing focus and a sense of security. It’s about balancing energies in your space to promote productivity and career prospects.
Window Considerations: While placing your desk facing a window offers natural light and inspiring views, it comes with drawbacks like potential glare and distractions. Feng Shui advises against this orientation due to energy scattering, suggesting remedies like plants or blinds to maintain focus if this setup is necessary.
Against the Wall: A desk facing the wall can minimize distractions and fit well in smaller spaces. However, this might feel limiting and encourage clutter behind you. Feng Shui views this as facing life’s obstacles, recommending inspiring elements on the wall to keep positive energy flowing.
Step 6: Adjust Chair and Desk Heights

Start by setting your chair height so that your feet rest flat on the floor, with your knees at a 90-degree angle. This position supports your lower back and reduces strain.
Your chair should allow your thighs to be parallel to the floor, with your arms at the same level as your desk. This alignment helps minimize pressure on your back, neck, and wrists, fostering better posture and comfort.
Your desk should be adjusted to keep your forearms parallel to the floor when typing. This helps maintain a relaxed shoulder position, preventing strain.
If your desk is too high or too low, it can lead to discomfort in your shoulders, arms, and even cause you to hunch over, which can result in back and neck pain.
You might need a tape measure to ensure accurate adjustments and possibly a level to confirm your work surface is perfectly horizontal. For chairs that are too high, consider a footrest to support your legs properly. If your chair lacks lumbar support, adding a cushion can enhance comfort.
Once your chair and desk are set to the right heights, fine-tune your seating position. Ensure your back is against the chair with proper lumbar support, and adjust the backrest and armrests to support the natural curve of your spine and allow your arms to rest comfortably.
Step 7: Adjust Monitor Height and Distance
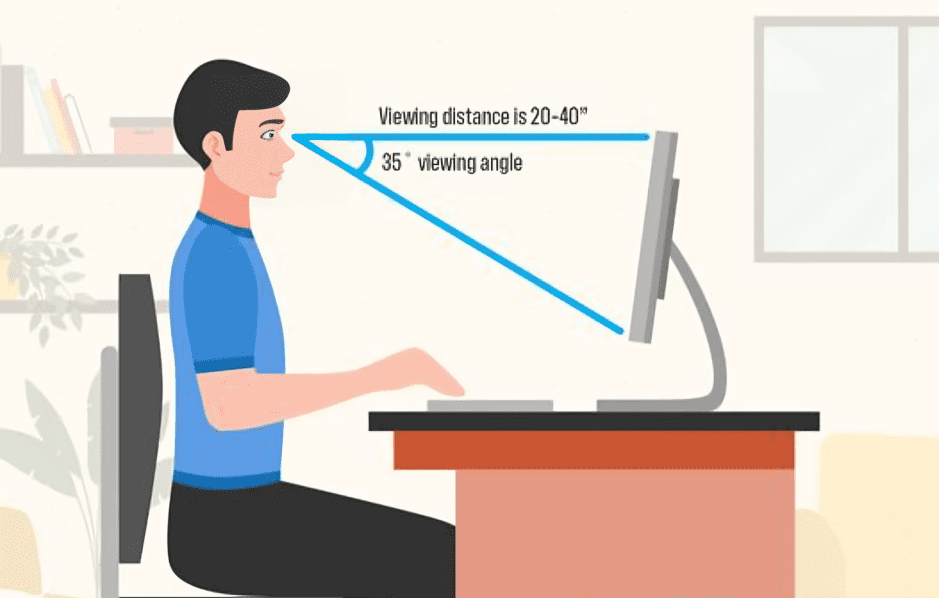
Proper monitor placement is a critical aspect of an ergonomic workspace, especially in our screen-centric work environments. It not only aims to reduce eye strain but also supports a healthy and comfortable posture throughout your workday.
Ideal Monitor Position for Eye Comfort
The position of your monitor can have a significant impact on your comfort. Here’s how to set it up ideally:
- Monitor Height: The top of your monitor screen should be at or slightly below eye level. This positioning allows your eyes to naturally look downward at a slight angle, around 15 to 20 degrees.
- Distance: The monitor should be about an arm’s length away. This distance varies depending on the size of your screen and your vision, but generally, it should be around 20-30 inches from your eyes.
Tips for Multiple Monitors
If you use multiple monitors, consider the following:
- Positioning: Place the monitors at the same height and distance. If you use one monitor more frequently, position it directly in front of you and the secondary monitor to the side.
- Angle: The monitors should form a gentle arc in front of you, so you can easily view each screen with minimal head movement.
- Avoiding Overlap: Ensure there’s no overlap of the screens, as this can cause you to twist your neck or body uncomfortably.
Step 8: Use Proper Lighting in Your Desk Area
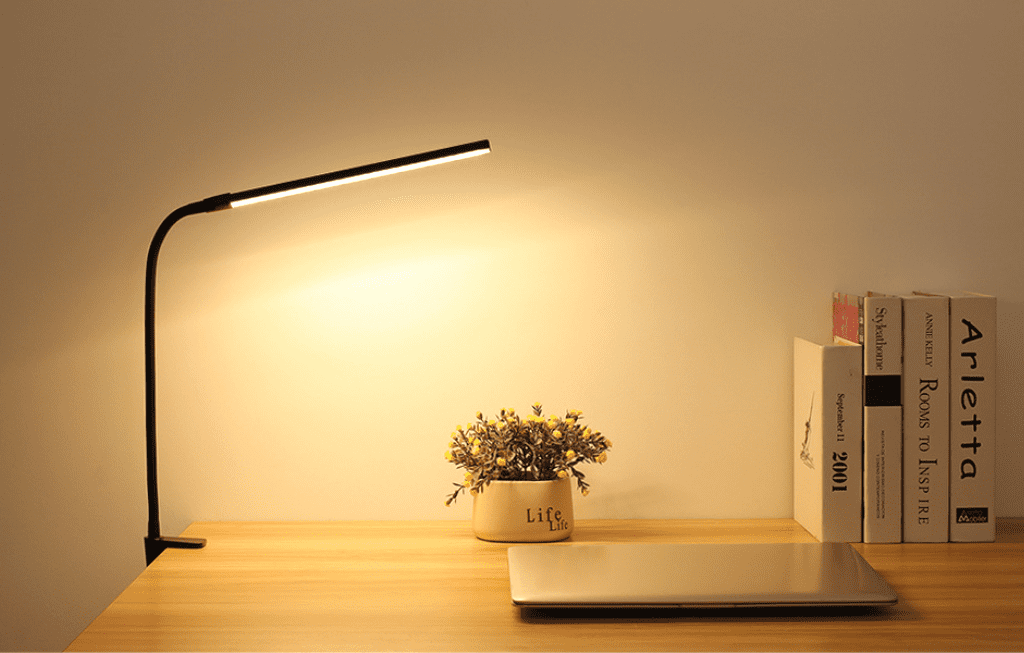
A combination of natural and artificial light sources can create an optimal work environment for reducing eye strain and enhancing productivity. Position your desk to take advantage of natural light during the day, but avoid direct sunlight that can cause glare.
Consider an adjustable LED desk lamp for artificial lighting. LED lamps are energy-efficient and can mimic daylight, reducing eye strain. Place the lamp to the side of your work area to avoid shadows or glare on your screen.
Adding a monitor light bar to your setup can further improve your lighting situation. These bars attach to the top of your monitor, casting a focused, adjustable light across your desk without taking up space.
Room lighting should work well with your desk light. Soft, indirect light helps reduce eye strain by making it easier to move your gaze from screen to room. Think about using ceiling lights or standing lamps for a good balance.
Adjust the lighting based on the time of day and the tasks at hand. Brighter light is energizing and suitable for focus-intensive tasks, while warmer, dimmer light can be calming, ideal for reading or brainstorming sessions.
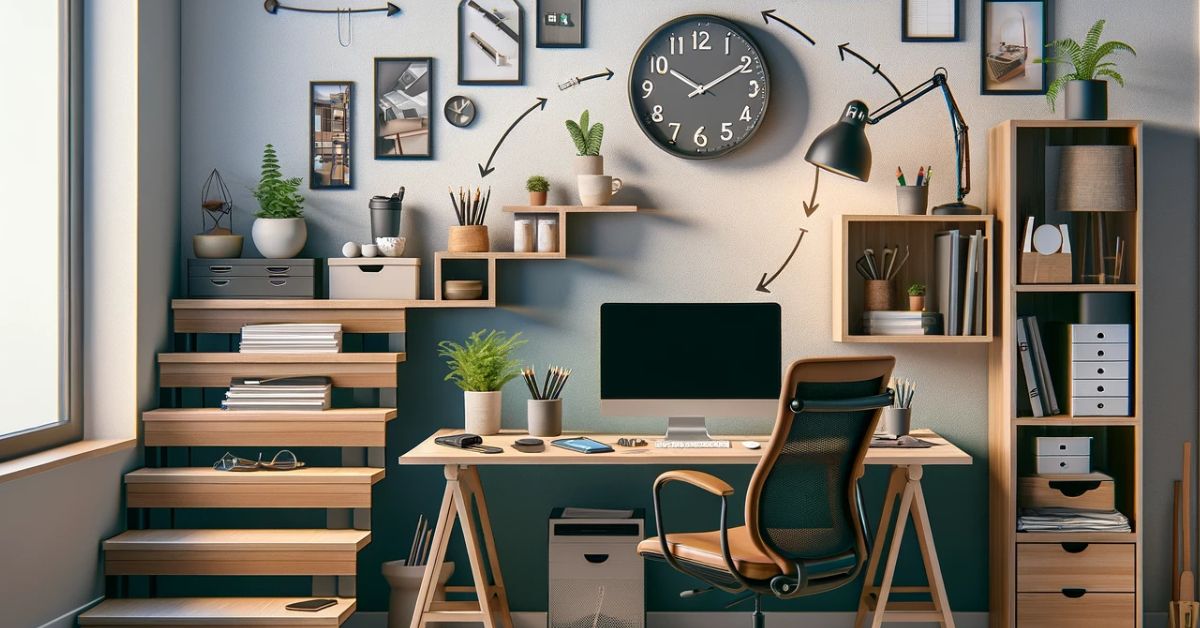
Step 9: Keep Tools at Your Fingertips
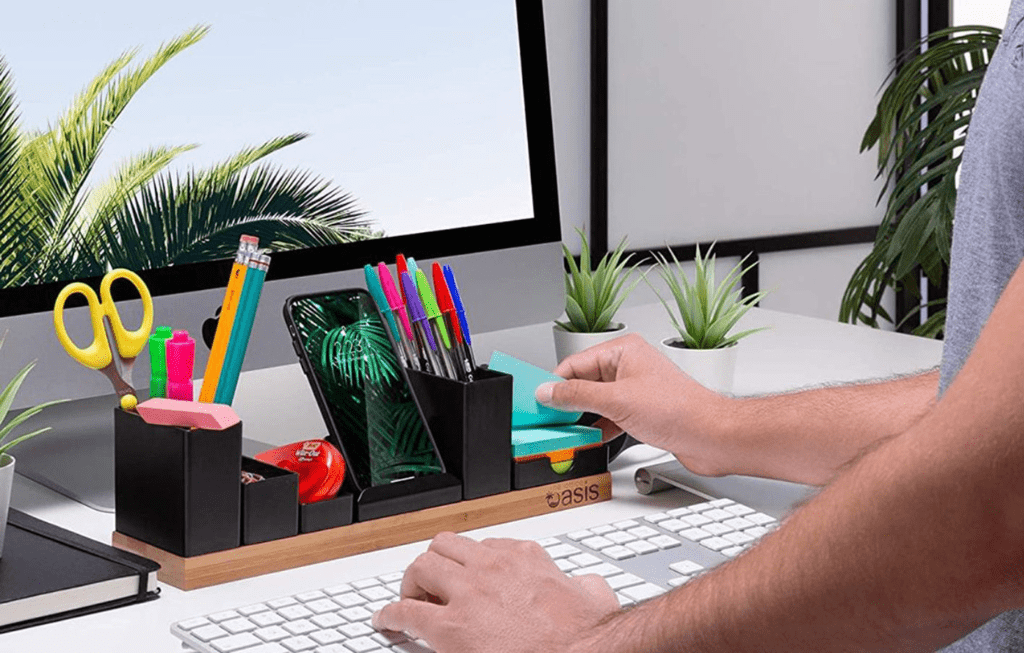
Keep essential tools like pens, highlighters, agendas, and sticky notes within easy reach on your desk. This allows for seamless access without disrupting your workflow, enhancing focus and efficiency.
Use desk organizers or caddies to neatly arrange your most-used items. These not only tidy up your space but also ensure everything has its place, making it simple to find and return items as you work.
Store less frequently used items in drawers or desk organizers to minimize clutter. Keeping these items out of sight but within reach helps maintain a clean workspace, focusing on functionality.
Aim for a balance between accessibility and minimalism in your desk setup. By strategically placing essential tools and discreetly storing secondary items, you create an organized, distraction-free environment that boosts productivity.
Step 10: Consider Cable Management
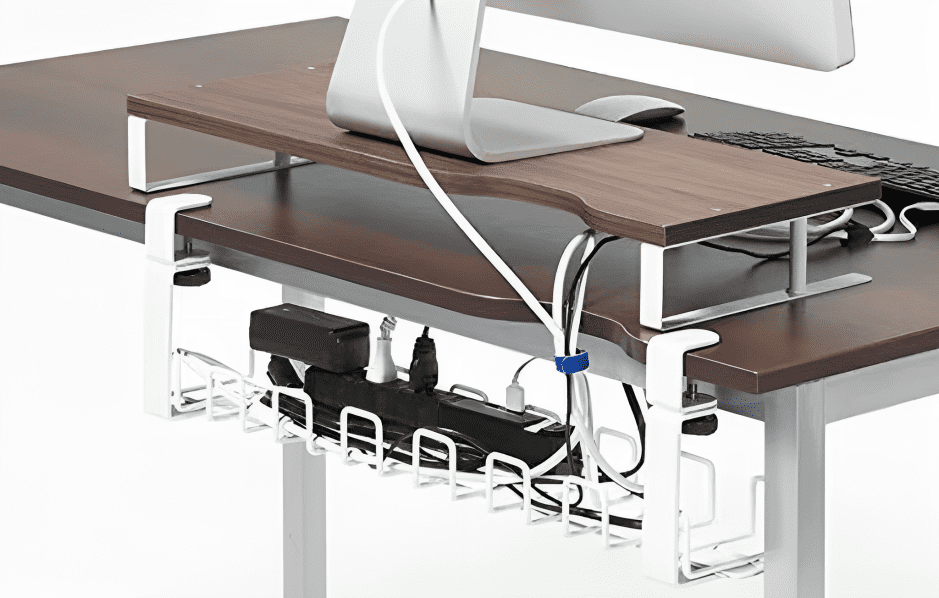
Effective cable management is essential for maintaining an organized and visually appealing workspace. Start by identifying all the cables on your desk, including those for your computer, monitor, keyboard, mouse, and any other peripherals.
Use cable ties, clips, or sleeves to bundle cables together, reducing clutter and minimizing the risk of tangling. These simple tools are effective in keeping cables neat and can be easily adjusted as you add or remove devices from your setup.
Consider routing cables under or behind your desk to keep them out of sight. Many desks come with built-in cable management solutions, such as grommets or channels, that allow you to run cables neatly and prevent them from dangling. If your desk lacks these features, adhesive cable clips or under-desk trays can be added to achieve a similar effect.
For power cords and chargers, a cable box or surge protector can group multiple plugs into one location, reducing clutter and making it easier to access power when needed. Ensure that this setup is easily reachable but out of the way to maintain a clean look.
Regularly review and adjust your cable management setup to accommodate new devices or changes in your workspace.
Step 11: Add a Little Nature

Adding a couple of plants can brighten up a dull space with some color and life. It also helps you feel closer to nature, making your work area more cheerful and welcoming.
Houseplants can help lower stress, giving you a peaceful break from your busy day. Taking care of your plants, like watering or trimming them, is a great way to relax and take your mind off work for a little while.
Choose plants based on the light in your office. Succulents need bright light, while ferns thrive in low light, making them versatile for different lighting conditions. Flowering plants add color but require more light.
Picking the right plants makes your desk look and feel better. They make your workspace healthier and more enjoyable, helping you work better.
Step 12: Keep Your Goals at Sight
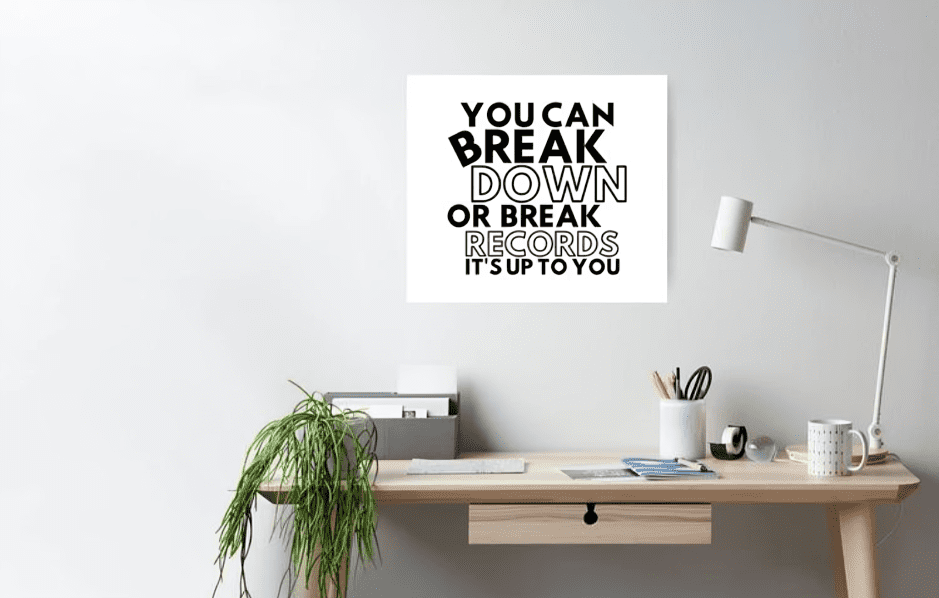
Keeping your goals visible is a powerful strategy to stay focused and motivated, especially when distractions are abundant and workloads become overwhelming. A constant reminder of what you’re working towards can significantly influence your daily productivity and mindset.
Put something in your workspace that reminds you of your goals and why you’re working hard. This could be a picture that inspires you, a poster, or a simple note with an important phrase you can always see.
These reminders help you stay focused on your big goals and lift your spirits when work gets tough. They show you the bigger picture and remind you why you started this journey.
Choose something that really means something to you, like a vision board or a special quote. Make sure it’s something that speaks to you and put it where you can always see it.
By adding these reminders to your desk, you turn your workspace into a place that not only helps you work but also keeps you motivated and focused on your goals.
Step 13: Keep Your Desk Clean With Routine Maintenance
Keeping your desk organized is essential for maintaining focus and productivity. Clutter can be distracting and make it difficult to find what you need when needed. To maintain an organized desk, develop daily habits such as tidying up at the end of each workday. This might include filing away papers, putting pens back in their holder, and clearing away coffee cups.
Another habit is to do a weekly review of your desk. This is a time to organize your documents, check your supplies, and remove anything that doesn’t belong on your desk. It’s also a good opportunity to wipe down your desk surface, which can help create a fresh start for the next week.
It’s also beneficial to re-evaluate your home office setup periodically. As your job or habits change, your office needs might also change. Every few months, take a step back and look at your space with fresh eyes. Do you need more storage? Is your chair still comfortable? Adjusting your space to fit your current needs can help you stay productive and happy in your home office.
Before You Go…
Once your home office desk is set up, take the time to enjoy it. Sit down, look around, and appreciate your effort to create a unique space. As you start to work, pay attention to how you feel and how well the setup meets your needs. Remember, the advantage of a home office is its adaptability—if something isn’t working for you, feel free to adjust.
If you’re looking for inspirations especially if you’re working with limited space, be sure to check out my previous article.